Sticky Toffee Pudding

This is Jack’s favourite hot pudding so there was no problem deciding what to serve up for his recent birthday pudding. The only down side of it was that we were all so full up after it that we didn’t have any space left for birthday cake.

3 oz butter (75g)
5 oz sugar (150g)
2 eggs, beaten
6 oz self-raising flour (175g)
6 oz stoned dates, chopped (175g)
6 fl oz boiling water (175 ml)
1 teaspoon vanilla essence
2 teaspoons instant coffee granules
3/4 teaspoon bicarbonate of soda

For the topping

3 oz brown sugar (75g)
2 oz butter (50g)
3 tablespoons of double cream

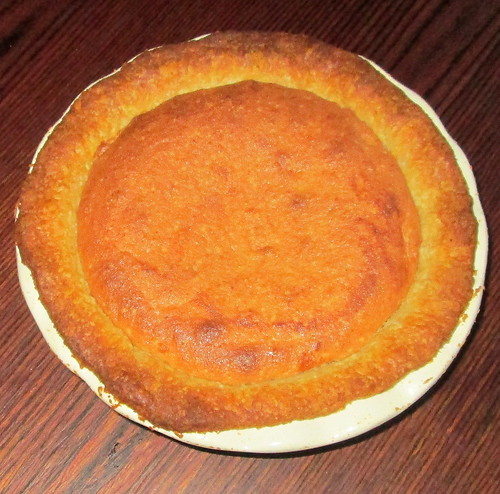
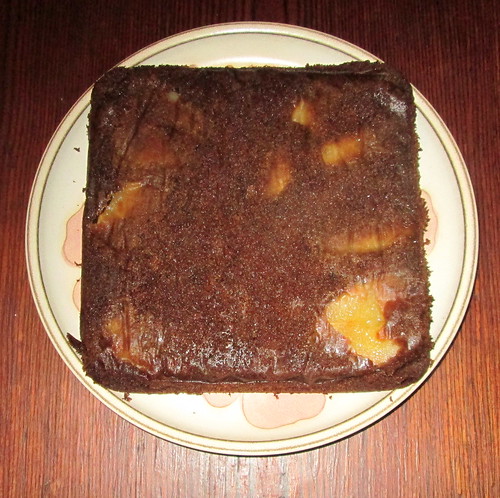
Grease the dish which you intend to use, as you can see I’ve used a Pyrex dish.

Put the butter and sugar in a bowl and beat until light and fluffy, then add the beaten eggs gradually and mix well together. Then fold in the flour, using a metal spoon.

Put the chopped dates into a separate bowl and pour in the boiling water. Add the vanilla essence, the coffee granules and the bicarbonate of soda. Stir well then using a sieve drain the liquid into the creamed mixture and mix it all together until it is a smooth batter. Pour the batter into the prepared dish, then sprinkle the dates on top of the mixture.

Bake in the centre of the oven gas mark 4, 350 F, 180 C, for about 45 minutes, until the top is rounded and springy to the touch.

About ten minutes before the end of the baking time mix all the topping ingredients together in a saucepan and heat gently until the sugar is dissolved and it’s bubbling.

As soon as you take the cake out of the oven stab it all over with a skewer and pour the topping all over it.

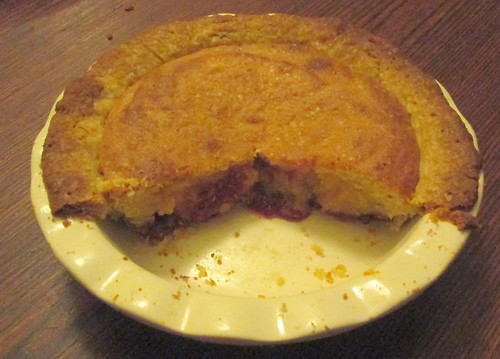
This can be eaten cold but we prefer to have it hot with cream or ice cream and I always make at least double the amount of the toffee sauce because we all love it and then we can have a lovely puddle of sauce.

As you can imagine this is very fattening so it is best kept for high days and holidays, or even Sunday!

Chocolate Up and Over Pudding

chocolate up and over pudding

chocolate up and over pudding

I blogged about this pudding/dessert years ago but I made it again recently and mentioned it to a friend who wanted the recipe, so here it is again. It doesn’t look fantastic in this photo but taste-wise it’s a winner.

This is a great recipe for those times when the whole family is asking – What’s for pudding? and you haven’t had time to think about it. All of the ingredients are what I would call ‘store cupboard essentials’, nothing fancy, but everybody loves it.

Chocolate Pudding

75g/3oz self-raising flour
1 rounded tablespoon of cocoa powder
125g/4oz soft margarine
125g/4oz granulated sugar
2 eggs

Topping and sauce

1 rounded tablespoon cocoa powder
125g/4oz demerara sugar
300 ml/ 1/2 pint hot, strong black coffee. Instant is fine – use 3 teaspoons added to the water.

Grease an oven proof dish of 2 pint capacity.

Put all of the pudding ingredients into a mixing bowl at the same time and with a wooden spoon or electric mixer, beat until smooth.

Tip the mixture into your greased dish and smooth flat.

Sprinkle 50g/2oz demerara sugar over the top.

Add the remaining 50g/2oz demerara sugar to the hot coffee and stir well. Carefully pour the coffee over the pudding mixture.

Bake at gas mark 4, 350 F, 180 C for about 50 minutes or an hour.

As if by magic the sponge rises over the coffee mixture during the cooking and a sauce is formed underneath.

It’s lovely served hot with ice-cream or cream.
It should serve 4 people.

Frances – the Bake Off winner.

For once my favourite to win this year’s Great British Bake Off actually won. I was rooting for Frances all the way. If you are interested you can read more about her and the Bake Off here.

I love her clever designs so I wasn’t surprised to find out that she is a children’s clothes designer. Although she was originally criticised by the judges for having more interest in the look of her food rather than the flavours, she obviously learned from her earlier mistakes and deserved to win.

I’m still not happy that James Morton didn’t win last year as he seemed to me to be by far the best baker. He had great taste in Fair Isle jumpers too!

A Woodland Walk for Brambles

About a week ago we went for a woodland walk down to the Mill Dam which is on the edge of Beveridge Park in Kirkcaldy. I went armed with a plastic box, just in case I found some ripe brambles/blackberries.

Mill dam

It wasn’t long before I found a nice fankled clump of them, I’ve dug up quite a few which have been growing in my garden because if I left them they’d take over in no time, but I’m glad to see them out in the wilds.

bramble walk 1

As you can see from this photo there were still a lot which weren’t quite ripe enough for the picking, they’re probably just about perfect now if you fancy picking some for yourself.
I heard a racket in the trees above and discovered that it was grey squirrels racing from tree to tree. I had no idea they were so noisy, but maybe they were trying to knock down the acorns to add to their stores, they succeeded anyway as it was raining acorns.
bramble walk 2

I picked over 2lbs of brambles in no time. When I got back home I had to look up some recipes to see what I could do with them.
abrambles 1

In the end I didn’t do anything exciting at all, just added them to apples and boiled them up with sugar to make jam. I do have big pans which are the perfect size for jam making but they’re old aluminium pans and they are now recommending that you don’t use them for acidic fruit as the aluminium is not good for you and possibly contributes to your chances of getting dementia. The acid doesn’t half clean the aluminium well though – I know from past experience! I used my wok as the important thing is to have a pan wide enough to get a good boil going.
brambles 2

I used ordinary eating apples and I don’t know which variety they were but they give the jam a slightly spicy flavour, as if I had added ginger or nutmeg to the mix. Jam should be 60% sugar to make sure that it does preserve the fruit and I used my sugar thermometer to make sure that it would set well, getting it to a temperature of 105 oC. I made four jars of jam and as I made some lemon curd a few weeks ago too that’s enough to keep us going for a while as we no longer have ravenous boys at home to feed.

Bakewell Tart/Pudding

Bakewell tart 1

This is the first time I’ve ever made Bakewell Tart, but as I did it in quite a deep pie dish I think this counts as pudding rather than tart. When we were in Bakewell last year we tasted the original Bakewell puddings which taste absolutely nothing like the Mr Kipling ones which we’re all used to nowadays, in fact I really didn’t like the original one at all, which is why I thought I would have a go at making one myself.

I baked the shortcrust pudding case ‘blind’ the day before making the filling. I always use all butter or margarine for pastry as I don’t like the idea of lard and for me anyway it’s a nicer flavour, I always add a heaped teaspoonful of icing sugar for sweet pastry – but that’s just me.

Shortcrust Pastry:

6 oz plain flour
3 oz margarine
1 heaped teaspoon of icing sugar
a little water to mix it

If you can’t do pastry there’s no shame in buying the frozen kind.

Bakewell filling:

3 oz butter or margarine
3 oz sugar
1 egg
1 oz plain flour
3 oz ground almonds
1 1/2 oz cake crumbs or about 6 or 8 crushed sponge fingers
2 tablespoons milk
drop of almond essence
3 tablespoons raspberry jam

Cream the margarine and sugar together unitl very light. Beat in the egg, fold in the flour, icing sugar, ground almonds and sponge crumbs, add the milk and almond essence.

Spread the bottom of the flan case with raspberry jam.

Place the filling mixture on top and spread evenly.

Bake in the centre of a moderately hot oven for 40-50 minutes. Gas mark 5 – 6 or 375/400 F.

Leave to cool slightly and dust with some icing sugar if wished.

My original recipe does not have almond essence in it but as I love almond flavour I decided to add it.

My pudding was slightly softer in the very middle than it should have been, probably I should haveleft it in the oven a wee bit longer, maybe at a slightly lower temperature, as ever some fine tuning is needed as all ovens are different. I didn’t have any cake crumbs to hand when I did this but I did have sponge fingers which were left over from when I made a trifle, so I thought I would give it a go and it worked perfectly.
Bakewell Tart
This tart/pudding is so much better than the ‘original’ ones on offer in the town of Bakewell, to my taste anyway. I was thinking of Jo at The Book Jotter’s Nan as I was making this one as apparently she used to spread lemon curd on the base instead of rasberry jam. So I’ve already made a small batch of lemon and lime curd and that will be the next thing I bake as home made curd doesn’t have the same sort of shelf-life as jam or jelly.

On the right hand side below are original Bakewell puddings, as sold in the town of Bakewell.
Bakewell Tart

Grasmere Gingerbread

The village of Grasmere is famous for its gingerbread and I first tasted it when we went there recently. It was a bit of a surprise as it isn’t gingerbread as we know it. It isn’t cakey at all, in texture and consistency it’s more a cross between shortbread and flapjacks, and it is very good. As it’s quite robust it would be perfect for picnics or packed lunches. I knew I had seen a recipe for it in one of my many cookery books and at last I’ve just got around to trying it out.

Unfortunately Flickr has gone all wonky tonight, I hope I can add my photo soon.

Edited to add:- OK today; so here it is.

Grasmere Gingerbread


Grasmere Gingerbread

175g/6 oz wholewheat flour

50g/2 oz porridge oats

1/2 level teaspoon bicarbonate of soda

1 level teaspoon cream of tartar

2 level teaspoons ginger

175g/6 oz margarine

175g/6 oz brown sugar, muscavado gives a good flavour

50g/2 oz mixed dried peel finely chopped (optional)

Method:

1. Put flour and oats in a bowl and sift in bicarbonate of soda, cream of tartar and ginger. Mix well.

2. Rub in margarine, stir in sugar and mixed peel.

3. Press mixture into a greased Swiss roll tin, 28 by 18 cm/11 by 7 inches.

4. Bake in a warm oven, Gas 3, 325 F, 160 C, for about 30 minutes until brown.

5. Allow to cool in tin for 5 minutes then cut into fingers.

I did add the dried peel but 2 oz is an awful lot of peel so I added about half of that amount. It gives a lovely tang to the biscuits but even at half the amount it is very orangey, next time I think I’ll add some crystalized ginger too as I know that that would go down well with Gordon, our youngest son, who says that it isn’t possible for something to be too gingery. I’ll have to think of a new name for it then.

I made the dried peel myself, it’s a bit of a faff to do but I couldn’t find it in my local supermarket. I usually have an orange every day so waited until I had about a week’s worth of peel stored in a tub in the fridge before making it.

Dried peel is different from candied peel, which as you would expect has sugar added to it.

To make dried peel pare the bitter pith from the skin and cut the skin into strips, spread out on a baking tray and dry in the oven on a very low heat. Half an hour should do it but keep an eye on it as it will burn easily. It will keep well in a jar. Mine was very dry and brittle, maybe a wee bit overdried but it made it very easy to break it smaller, by putting into a small bowl and bashing it with the end of my rolling pin.

This is linked with Beth Fish Reads Weekend Cooking

Victoria Sponge Sandwich

This is the most popular cake which is sold in the National Trust tearooms, which was a bit of a surprise to me but then I thought about it and it’s probably because it is a classic from childhood and let’s face it people in the National Trust tend to be the older generation who might think that Lemon Drizzle cake is something outrageously new and different so not worth the risk. They sell an amazing 171,000 slices per year.

Victoria Sandwich 2

I must get myself a sugar dredger or whatever you call them, because I just shook the sugar off a spoon and it didn’t work very well. I halved the quantity of the ingredients in the recipe, which meant that I used just three eggs when seven were used in the original. I think that half egg should have been substituted with a sploosh of milk or even some apple juice works well in a sponge if you think the mixture is a bit stiff. It is a wee bit dry for my taste and I’m sure that was why.

However, it is tasty and it’s also a very big cake, even just half the size it should be. The sandwich tins I used are 8 inches in diameter internally. I also added a few drops of vanilla extract to the cake mixture because I hate that eggy flavour you sometimes get in homemade sponges and the vanilla stops that happening. I used strawberry jam to sandwich the layers together.

avic sponge 3

Victoria Sandwich

Ingredients

350g/12oz self-raising flour

350g/12oz butter

350g/12oz caster sugar

350g/12oz (7) eggs

a few drops of vanilla extract (optional)

250g/9oz raspberry jam

Caster sugar to dust

Method

1. Preheat the oven to 170oC (gas mark 3).

2. Grease and line two 9-inch sandwich tins.

3. Place the butter and sugar in a large bowl and use a whisk to beat until light and fluffy.

4. Add half the eggs and whisk to combine, add remaining eggs and whisk well until light.

5. Sprinkle over the flour and with a spatula fold into the eggs, using a figure-of-eight motion. Be gentle, you need to keep as much air as you can in the batter.

6. Divide between the tins and bake for 35-40 minutes. Test using a skewer inserted into the middle of the cakes; if it comes out clean, they’re ready.

7. Once cool, use the jam to sandwich both halves together. Finish with a dusting of caster sugar.

This post is linked to Beth Fish Reads Weekend Cooking

Coffee and walnut cake

whole cake side

Coffee and walnut cake

Serves: 8
Preparation time: 20 minutes
Cooking time: 20 minutes

Ingredients

Sponge:

250g (8oz) self raising flour

250g (8oz) margarine.

250g (8oz) sugar

4 eggs

1 tablespoon instant coffee mixed in a little hot water

1 tablespoon crushed walnuts (I added quite a lot more than this, just because I had walnuts which needed to be used up)

Icing:

125g (4oz) butter

250g (8oz) icing sugar

1 teaspoon instant coffee mixed in a little hot water

Method

Sponge

Preheat the oven to 200C or gas mark 6

1. Cream together margarine and sugar in a mixing bowl.

2. Add the beaten eggs to the mixture.

3. Add the crushed walnuts.

4. Add the coffee mixed with water and stir well.

5. Fold in the flour gently.

Put equal amounts into 2 x 8″ greased round sandwich tins, bake for 20 mins at 200C/360F/gas 6

Filling

Cream together butter and icing sugar in a bowl
Add mixed coffee

Sandwich cakes together with filling leaving a little to spread on top, then sprinkle with whole walnuts. You might be able to see from my photo that I grated some white chocolate over the cake, in an attempt to get Jack to eat it, but of course it just made it even sweeter.

This is a good cake, although it is quite dense, but not heavy – if that makes sense. I was not keen on the buttercream aspect of it though, it was too sweet.

The next time I bake this one I’m going to bake it in a loaf tin and make up a coffee syrup, skewer it all over and drizzle the syrup into it. I’m also going to use pecans instead of walnuts as Jack doesn’t like walnuts. I can’t taste much difference between them, but there you go, our taste buds are all different I suppose.

This is one of the cakes which is served in National Trust tearooms. It’s the third most popular one, they sell 102,000 slices of it per year! I think I’m going to bake their biggest seller next week – can you believe that it’s Victoria sponge? They sell 171,000 slices of that in a year.

a slice of cake

This post is linked with Beth Fish Reads Weekend Cooking.

Scottish Tablet/ Swiss Milk Tablet

By popular demand (Evee and Peggy) I’m posting this tablet recipe which I blogged about nearly three years ago now. Since then I’ve adapted the recipe a bit. My mother’s hand-written recipe just says – a tin of condensed milk and doesn’t specify the size and I have experimented and decided that it works just as well with half a large tin or 1 small tin of condensed milk. Also I recently bought a sugar thermometer which only cost £6 but makes sweetie making so much easier. If you have one then you should turn the heat off when the mixture reaches the soft ball mark on the thermometer. Then add a drop of vanilla extract and beat with a wooden spoon as usual. If you don’t have a sugar thermometer you can still make tablet following the instructions below.

Swiss Milk Tablet

The photo above is of the tablet I made a while ago, you might want to cut your pieces smaller, my mum made small bite sized cubes. I made two batches recently, one with ordinary white sugar and the other with 1 lb of white and 1 lb of dark muscavado sugar. This makes it quite black treacly in flavour. Next time I’m going to try demerara sugar. I’ll put a new photo on soon.

Scottish Tablet (originally posted in February 2010)

This recipe has been handed down in my family for at least four generations. It is unbelievably sweet but at the same time very more-ish. So, if you are keen to hold on to your teeth, keep this recipe for high days and holidays only.

2lb sugar
4 oz unsalted butter
1 cup milk
1 large (397g) tin of condensed milk (or half of it for the healthier option)!!
drop of vanilla extract

Put the sugar, butter and cup of milk into a large heavy-based pot and cook on a low heat, stirring occasionally with a wooden spoon, until the butter has melted and the sugar has dissolved and then bring the mixture to a good ‘rolling’ boil.

It is important that you use something like a large soup pot as you really don’t want this mixture boiling over on to your hob.

Pour the condensed milk into the pot and stir carefully. Turn the heat down to the lowest setting and allow the mixture to come to the boil again. Don’t stir it.

Have a cup of cold water ready for testing the tablet. The amount of boiling time required before getting to the testing point is a bit of a guessing game, but with practice you will know just by looking at the mixture as it will have turned slightly darker and be thicker in consistency. It takes about 15 minutes to get to this stage on my hob, it’s called the soft ball stage, but as you can imagine it will vary greatly, depending on your hob and the type of pot used. I use an old aluminium soup pot.

Carefully scoop a teaspoonful of the mixture out of the pot and dip it into the cup of water. Leave for a few seconds and test for toffeeish consistency (not quite dripping off.) Repeat this if necessary until the mixture is at this stage.

Then turn off the heat and add the drop of vanilla extract. Beat the mixture with the wooden spoon. Be careful not to splash any of it on to you. Keep beating until you feel the consistency changing. It should feel heavier and thicker and you will feel the spoon ‘catching’ on the base.

Very carefully, pour the tablet into a non stick baking tray. Mine is 11 inches long and 7 inches wide and about 2 inches deep. This is really a two person job. One to hold the pot, while the other scrapes. Allow to cool and set slightly before marking into squares.

Watch how quickly it disappears. Be amazed by how fast you can put on weight. And fingers crossed that you don’t need any fillings when you next visit the dentist.

Pear and Ginger Pudding

The supermarkets have plenty of nice pears at the moment so I thought I’d try this recipe.
Pear and Ginger Pudding

As you can see from my photo, I must have been having a wee bit of a senior moment when I took it because the pudding is upside-down on the plate, I did peel the greaseproof paper off the bottom of it, although it looks as if it’s still on. I know what was going through my head when I did it, I was thinking it was the upside-down pear pudding I sometimes do, but that is really quite different. I’ll be doing this one again as it went down very well with some cream, but as usual Jack thinks it would be even nicer with custard!

You need:

5 small pears, peeled, halved and cored
100g or 4 oz butter, plus extra for greasing
100g or 4 oz light brown muscovado sugar
100g or 4 oz black treacle
125ml or half a cup of whole milk
140g or just under 6 oz plain flour
1 level teaspoon ground ginger
a few shakes of cinnamon
1 level teaspoon bicarbonate of soda
1 medium egg, beaten

1. Heat your oven to gas mark 2 or 150 C (130 C fan assisted oven)
Grease an 18cm square cake tin (I think mine is actually a bit bigger)Line the base with baking parchment or greaseproof paper.
Arrange the pears cut side down in the bottom.

2. Melt the butter,treacle and sugar gently on a low heat until the sugar has dissolved. Stir in the milk and leave to cool a little.

3. Sift together the flour, spices and bicarbonate of soda. Beat it into the melted butter mixture along with the beaten egg, I just used a hand balloon whisk to do this.

4. Spread the mixture evenly into the prepared cake tin, giving it a bit of a ‘dunt’ on the worktop to make sure there are no air pockets.

5. Bake for about 1 hour, using the usual skewer method to make sure the centre is cooked through. If it isn’t cooked but the top is browning too much then cover the top with some baking parchment or foil to prevent burning.

Eat!

There is a metric/imperial measurements site here.